AWS ALB logs
AWS ALB distributes incoming application traffic across multiple targets (such as EC2 instances, containers, or IP addresses) to improve fault tolerance and scalability. ALB logs, known as access logs, provide details on request and response data, including client IP, request path, latency, and response status, which help in monitoring traffic patterns, troubleshooting, and ensuring security.
Ingest Methods
Setup the ingestion of this source using one of the following guides.
If using an AWS S3 bucket use the following SNS topic ARN to send your bucket notifications.
SNS topic & Custom SQS. Use the ARN above in your event notification tied to your S3 bucket—the topic name must match (runreveal_…; hyphens in the source id become underscores). For Custom SQS, set the queue URL and region in RunReveal; see AWS S3 Bucket with Custom SQS.
Note: BYOC, On-Prem, and BYODB customers must use their AWS account ID in the ARN instead of 253602268883.
Setup
Step 1: Create an S3 Bucket
- Sign in to the AWS Management Console and open the Amazon S3 console.
- Click on "Create bucket".
- Enter a unique name for your bucket and select the region.
- Configure the bucket settings as needed (e.g., versioning, encryption).
- Click "Create bucket" to finish.
Step 2: Configure Bucket Policy
- In the S3 console, select the bucket you just created.
- Go to the "Permissions" tab.
- Under "Bucket policy", click "Edit".
- Paste the following policy, replacing
{your-bucket-name}with your actual bucket name:
- Replace
elb-account-idwith the appropriate ID for your region. You can find the list of IDs here. - Click "Save changes".
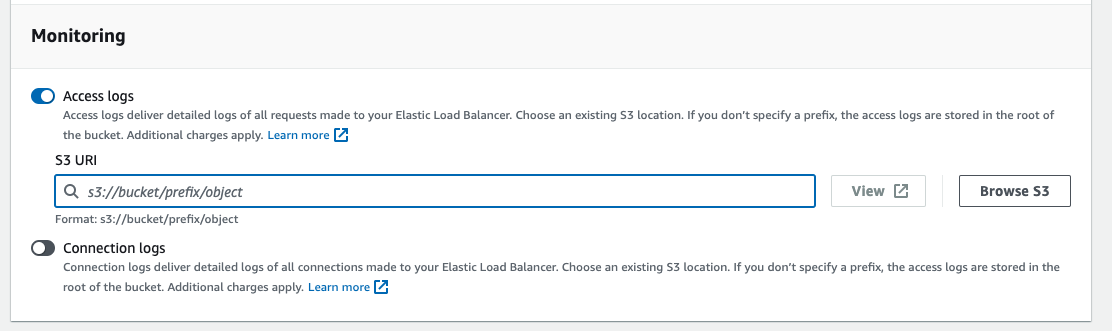
Step 3: Enable Access Logs for Your ALB
- Open the EC2 console and navigate to "Load Balancers".
- Select your Application Load Balancer.
- In the "Description" tab, scroll down to the "Attributes" section and click "Edit".
- Check the box next to "Access logs".
- Select the S3 bucket you created earlier from the dropdown.
- Optionally, specify a prefix for the log files.
- Click "Save".
Step 4: Verify Log Delivery
- Wait for a few minutes to allow some traffic to flow through your ALB.
- Go back to the S3 console and open your bucket.
- Navigate to the "AWSLogs" folder (or the custom prefix you specified).
- You should see log files appearing in this location.
For more information, refer to the official AWS documentation on ALB access logs.
Schema
The following columns are exposed for this source. RunReveal applies schema normalization across all sources, ensuring uniform field names and data types for cross-source queries and reusable detection logic.
Table: http_logs (31 columns)
http_logs (31 columns)| Column | Type |
|---|---|
id | String |
receivedAt | DateTime |
workspaceID | String |
sourceType | String |
sourceID | String |
serviceName | String |
eventTime | DateTime |
srcIP | String |
srcASOrganization | Nullable(String) |
srcASNumber | Nullable(UInt32) |
srcASCountryCode | Nullable(String) |
httpRemoteAddr | String |
httpRemoteUser | String |
httpRequestTime | String |
httpRequestReferrer | String |
httpRequestUserAgent | String |
| Column | Type |
|---|---|
httpRequestMethod | String |
httpRequestScheme | String |
httpRequestHost | String |
httpRequestServerAddr | String |
httpRequestURI | String |
httpRequestQuery | String |
httpRequestRequestUri | String |
httpRequestXfwd | String |
httpUpstreamAddr | String |
httpUpstreamBytesReceived | String |
httpUpstreamBytesSent | String |
httpUpstreamResponseTime | String |
httpUpstreamResponseLength | String |
httpResponseStatus | String |
httpResponseBodyBytesSent | String |