CloudTrail
AWS CloudTrail enables governance, compliance, and operational and risk auditing by logging detailed event history of actions taken within your AWS account. CloudTrail logs include information on who made API calls, what resources were affected, when the calls occurred, and the source IP, helping with monitoring, troubleshooting, and security analysis.
Ingest Methods
Setup the ingestion of this source using one of the following guides.
If using an AWS S3 bucket use the following SNS topic ARN to send your bucket notifications.
SNS topic & Custom SQS. Use the ARN above in your event notification tied to your S3 bucket—the topic name must match (runreveal_…; hyphens in the source id become underscores). For Custom SQS, set the queue URL and region in RunReveal; see AWS S3 Bucket with Custom SQS.
Note: BYOC, On-Prem, and BYODB customers must use their AWS account ID in the ARN instead of 253602268883.
Cloudformation Setup
If you don't yet have a trail setup, you'll need to either set up an Organization trail, or a non-organization trail. If you'd like RunReveal to create the trail, and fully set-up the event notification, and access to the bucket, you can use these cloudformation templates.
RunReveal can help with this setup process using these two Cloudformation templates.
- Organization Trail (this will fail if you've not created an organization).
- Non-organization Trail
Once the cloudformation runs successfully, provide RunReveal with the name of the bucket, ensure the Role ARN is blank, and click "Connect".
Manual Setup
Step 1: Create an S3 Bucket
- Sign in to the AWS Management Console and open the Amazon S3 console.
- Click on "Create bucket".
- Enter a unique name for your bucket and select the region.
- Configure the bucket settings as needed (e.g., versioning, encryption).
- Click "Create bucket" to finish.
Step 2: Configure Bucket Policy
- In the S3 console, select the bucket you just created.
- Go to the "Permissions" tab.
- Under "Bucket policy", click "Edit".
- Paste the following policy, replacing
{your-bucket-name}with your actual bucket name:
- Click "Save changes".
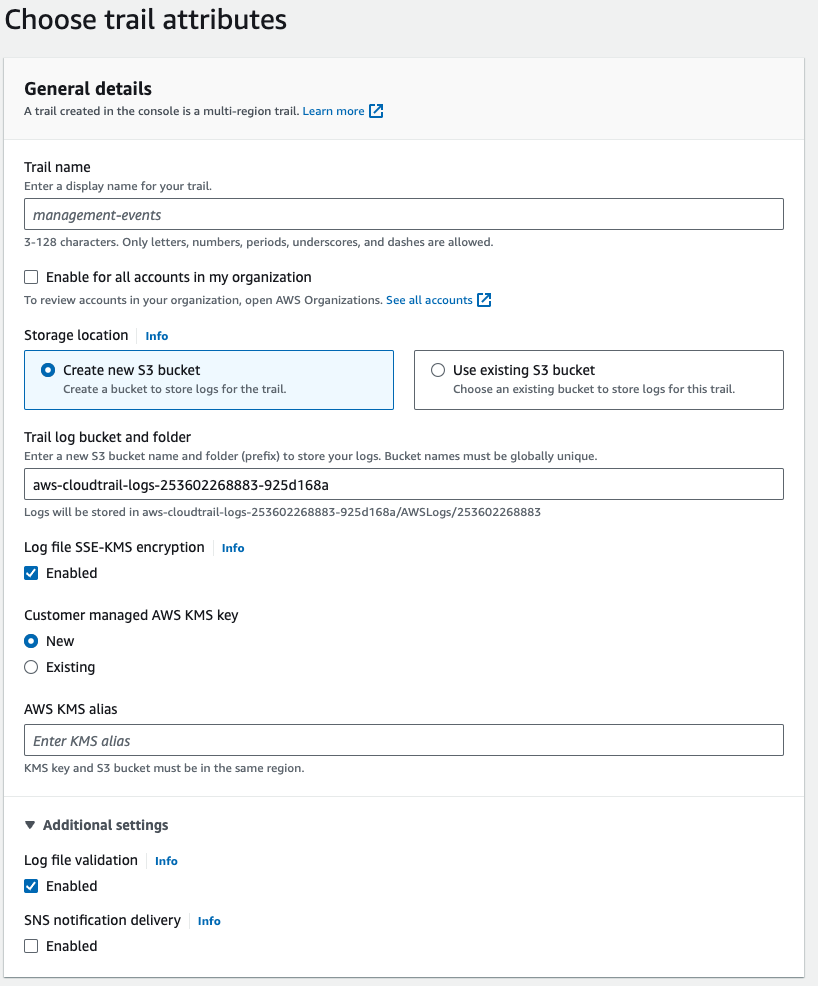
Step 3: Create a CloudTrail Trail
- Open the CloudTrail console.
- Click on "Trails" in the left navigation pane.
- Click "Create trail".
- Enter a name for your trail.
- For "Storage location", select "Create new S3 bucket" or "Use existing S3 bucket" and select the bucket you created earlier.
- Configure other settings as needed (e.g., log file validation, SNS notification).
- Click "Next".
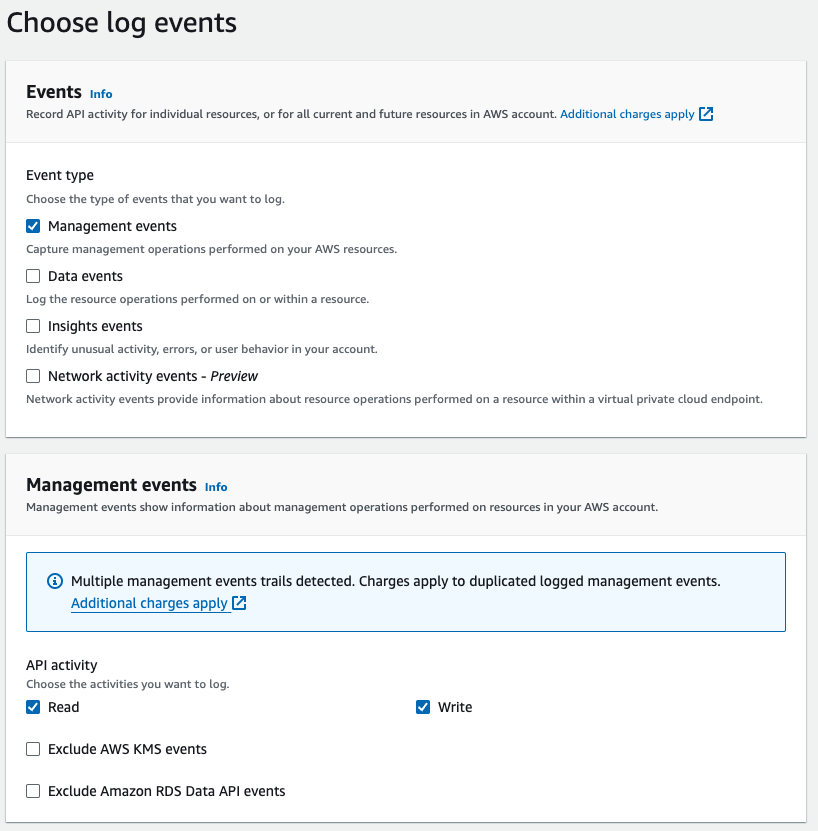
Step 4: Choose Log Events
- In the "Choose log events" section, select the types of events you want to log.
- For a comprehensive trail, you can select:
- Management events
- Data events
- Insights events (optional)
- Configure any additional event settings as needed.
- Click "Next".
Step 5: Review and Create
- Review your trail configuration.
- If everything looks correct, click "Create trail".
Step 6: Verify Log Delivery
- Wait for some time to allow AWS to generate and deliver logs.
- Go back to the S3 console and open your bucket.
- Navigate to the "AWSLogs" folder.
- You should see a folder structure like:
AWSLogs/{your-account-id}/CloudTrail/{region}/year/month/day/ - Inside the day folders, you'll find your CloudTrail log files.
Schema
The following columns are exposed for this source. RunReveal applies schema normalization across all sources, ensuring uniform field names and data types for cross-source queries and reusable detection logic.
Table: aws_cloudtrail_logs (61 columns)
aws_cloudtrail_logs (61 columns)| Column | Type |
|---|---|
workspaceID | String |
sourceID | String |
sourceType | LowCardinality(String) |
sourceTTL | UInt32 |
receivedAt | DateTime |
id | String |
eventTime | DateTime |
eventName | String |
eventID | String |
srcIP | String |
srcASCountryCode | String |
srcASNumber | UInt32 |
srcASOrganization | String |
srcCity | String |
srcConnectionType | String |
srcISP | String |
srcLatitude | Float64 |
srcLongitude | Float64 |
srcUserType | String |
dstIP | String |
dstASCountryCode | String |
dstASNumber | UInt32 |
dstASOrganization | String |
dstCity | String |
dstConnectionType | String |
dstISP | String |
dstLatitude | Float64 |
dstLongitude | Float64 |
dstUserType | String |
actor | Map(String, String) |
tags | Map(String, String) |
| Column | Type |
|---|---|
resources | Array(String) |
serviceName | String |
readOnly | Bool |
rawLog | String |
eventType | String |
eventSource | String |
awsRegion | String |
userAgent | String |
userIdentity.userName | String |
userIdentity.accessKeyId | String |
userIdentity.accountId | String |
userIdentity.arn | String |
userIdentity.principalId | String |
userIdentity.type | String |
userIdentity.sessionContext.attributes.creationDate | String |
userIdentity.sessionContext.attributes.mfaAuthenticated | String |
userIdentity.sessionContext.sessionIssuer.accountId | String |
userIdentity.sessionContext.sessionIssuer.arn | String |
userIdentity.sessionContext.sessionIssuer.principalId | String |
userIdentity.sessionContext.sessionIssuer.type | String |
userIdentity.sessionContext.sessionIssuer.userName | String |
userIdentity.invokedBy | String |
vpcEndpointId | String |
requestID | String |
errorCode | String |
errorMessage | String |
eventVersion | String |
apiVersion | String |
requestParameters | String |
responseElements | String |
Troubleshooting
CloudFormation Setup
- Ensure the CloudFormation stack completed successfully without errors.
- Confirm that the S3 bucket, SNS topic, and event notifications were created in your AWS account.
- When adding a new CloudTrail source in RunReveal, use the bucket name created by the CloudFormation template. The Role ARN should be left blank unless you have a custom setup.
- Check that CloudTrail is delivering logs to the S3 bucket (see Step 6 above).
- Verify that the event notifications are present on the bucket and point to the correct SNS topic.
Manual Setup
- Double-check that the S3 bucket policy matches the example provided and allows CloudTrail to write logs.
- Make sure the SNS topic exists and uses the correct ARN:
arn:aws:sns:<REGION>:253602268883:runreveal_cloudtrail. - Confirm that event notifications are configured on the S3 bucket to send new log files to the SNS topic.
- Ensure CloudTrail is configured to deliver logs to the correct S3 bucket.
For more information, refer to the official AWS documentation on CloudTrail.